

Iron on embroidered patches are a popular and convenient way to customize clothing, uniforms, bags, and accessories. They allow individuals and businesses to add branding, personality, or identification without the time and skill required for sewing. While these patches are designed to be user friendly, many people still make avoidable mistakes during application and care. These errors can lead to peeling edges, damaged fabric, or patches that fall off entirely.
Understanding the most common mistakes when using iron on embroidered patches can help you achieve long lasting results and keep your items looking professional.
Not Checking Fabric Compatibility
One of the most common mistakes is failing to confirm whether the fabric can safely handle heat. Iron on embroidered patches rely on heat activated adhesive, which requires a specific temperature to bond properly. Some fabrics simply cannot withstand this level of heat.
Delicate materials such as nylon, rayon, silk, leather, and vinyl may melt, scorch, or warp under an iron. Stretch fabrics can also be problematic because the adhesive may not bond evenly. Applying iron on embroidered patches to these materials without testing can permanently damage the item.
Before applying a patch, always check the garment care label. If the label warns against ironing or recommends low heat only, you may need to choose a different application method such as sewing or fabric adhesive. Testing a small hidden area with heat is also a smart precaution.
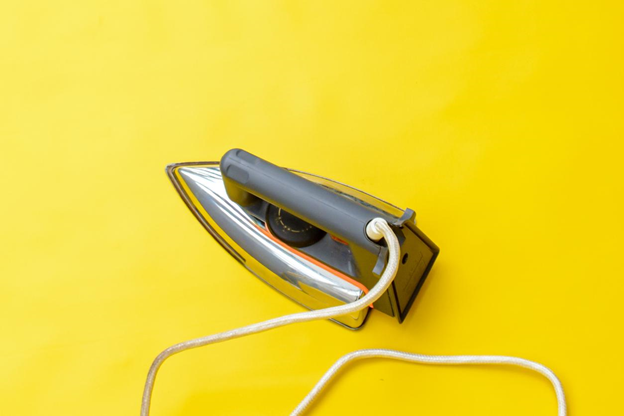
Using the Wrong Iron Temperature
Another frequent mistake is using an iron that is either too hot or not hot enough. Both extremes can cause problems. If the iron is too cool, the adhesive will not fully activate, resulting in a weak bond that peels over time. If the iron is too hot, you risk burning the patch, discoloring the thread, or damaging the garment.
Most iron on embroidered patches require a medium to high heat setting, typically the cotton setting with no steam. Steam can interfere with the adhesive and prevent proper bonding. Always refer to the patch manufacturer’s instructions when available, as adhesive formulas can vary.
Allow the iron to fully heat up before application. Applying pressure with a partially heated iron is a common cause of poor adhesion.
Skipping Pre Ironing the Garment
Many people overlook the importance of pre ironing the garment before applying a patch. Wrinkles, moisture, and uneven surfaces can prevent the adhesive from making full contact with the fabric.
Pre ironing removes wrinkles and ensures a flat surface for application. It also helps remove residual moisture from washing or storage, which can interfere with the heat activated adhesive. Even brand new garments can contain moisture or creases that affect adhesion.
Take a moment to iron the area where the patch will be placed before positioning it. This simple step can significantly improve the final result.
Not Using a Protective Cloth
Applying direct heat from the iron to the patch is a mistake that can damage both the patch and the garment. Embroidered threads can scorch, melt, or flatten under direct heat.
Always place a thin cloth, parchment paper, or pressing sheet over the patch before ironing. This protective layer distributes heat more evenly and prevents direct contact between the iron and the embroidery.
Skipping this step often results in shiny thread, flattened texture, or burned fibers, all of which reduce the visual quality of the patch.
Insufficient Pressure or Time
Iron on embroidered patches require more than just heat. They need consistent pressure for a sufficient amount of time to properly bond with the fabric.
A common mistake is lightly pressing the iron or moving it back and forth like normal ironing. Instead, you should apply firm downward pressure and hold the iron in place for the recommended duration, usually between 10 and 20 seconds per section.
Large patches may require working in sections to ensure even adhesion across the entire surface. Failing to apply enough pressure or cutting the time short can cause edges to lift later.
Ignoring the Back Side Press
Many people forget to flip the garment inside out and apply heat from the back side after the initial application. This step is crucial for strengthening the bond between the adhesive and the fabric fibers.
Pressing from the inside allows the heat to penetrate the fabric and fully activate the adhesive. Skipping this step can result in patches that appear secure at first but peel after washing or wearing.
After pressing from the back, allow the garment to cool completely before handling it. Cooling time helps the adhesive set properly.
Washing Too Soon After Application
Patience is essential after applying iron on embroidered patches. Washing the garment too soon is a mistake that can weaken the adhesive before it has fully cured.
Most patches require at least 24 hours before washing. During this time, the adhesive continues to bond and stabilize. Washing too early can cause the patch to lift or detach entirely.
When you do wash the garment, turn it inside out and use cold water on a gentle cycle. Avoid high heat drying whenever possible, as repeated exposure to high temperatures can soften the adhesive over time.
Improper Washing and Drying Practices
Even after the initial curing period, improper care can shorten the lifespan of iron on embroidered patches. Hot water, harsh detergents, and high heat drying all contribute to adhesive breakdown.
Another mistake is scrubbing the patch directly during washing. This can cause fraying, edge lifting, or thread damage. Dry cleaning is also not recommended unless the patch manufacturer specifically states it is safe.
Air drying or tumble drying on low heat is the safest option. Taking a few extra steps during care can greatly extend the life of your patches.
Skipping Reinforcement When Needed
While iron on embroidered patches are designed for convenience, they are not always the best solution for every situation. Heavy garments, outdoor gear, and frequently washed items often benefit from additional reinforcement.
Sewing a few stitches around the edges or corners can dramatically increase durability. Skipping this step in demanding applications is a mistake that often leads to early patch failure.
Reinforcement does not mean sacrificing aesthetics. Clear thread or matching thread can keep the patch secure without drawing attention.
Final Thoughts
Iron on embroidered patches offer an easy and effective way to customize apparel and accessories, but success depends on proper application and care. Most problems arise from simple mistakes such as using the wrong heat setting, skipping preparation steps, or rushing the process.
By avoiding these common mistakes and following best practices, you can ensure your iron on embroidered patches look great and stay securely in place for the long term. Taking a few extra minutes during application and care can make the difference between a patch that lasts for years and one that peels after the first wash.
The information below is required for social login
Sign In
Create New Account